 on [Unsplash](https://unsplash.com/s/photos/project?utm_source=unsplash&utm_medium=referral&utm_content=creditCopyText)](https://images.unsplash.com/photo-1586281380117-5a60ae2050cc?ixlib=rb-1.2.1&ixid=MnwxMjA3fDB8MHxwaG90by1wYWdlfHx8fGVufDB8fHx8&auto=format&fit=crop&w=2070&q=80)
This article will cover setting up a basic Godot Engine project for a 2D game.
Godot Project Setup
Step 1: If you do not already have Godot installed, then download and install the latest release from the Godot Engine Downloads page for your platform.
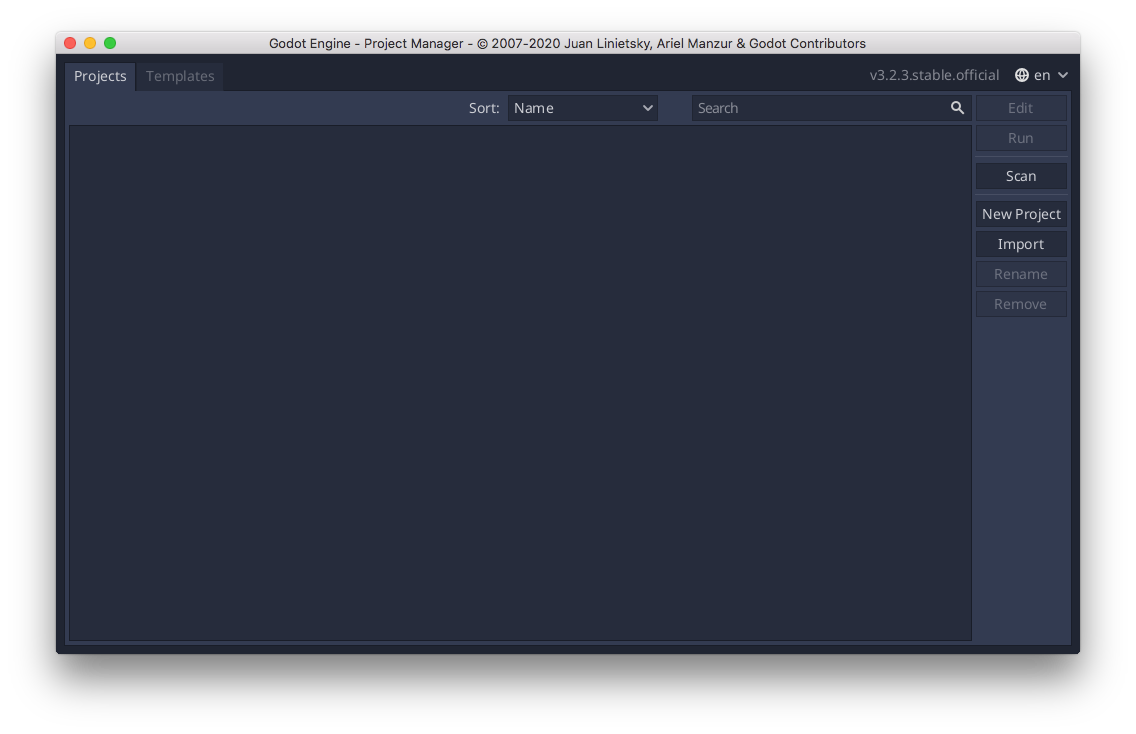
Step 2: Start Godot and you should be presented with the Project Manager window. Create a new Godot project by clicking the New Project button located on the right side of the window.
Step 3: Choose a project name and a desired save location. Click Create and Edit to create the project and launch the editor.
Step 4: Switch to the 2D scene editor by clicking the 2D button located at the top of the editor window. The editor should now look like the following.

Step 5: Create a basic 2D scene by clicking the 2D Scene button on the Scene tab located on the left side of the editor. Save the scene by clicking on the Scene button located on the menu bar at the top of the editor and then Save Scene. Choose a name and select Save.
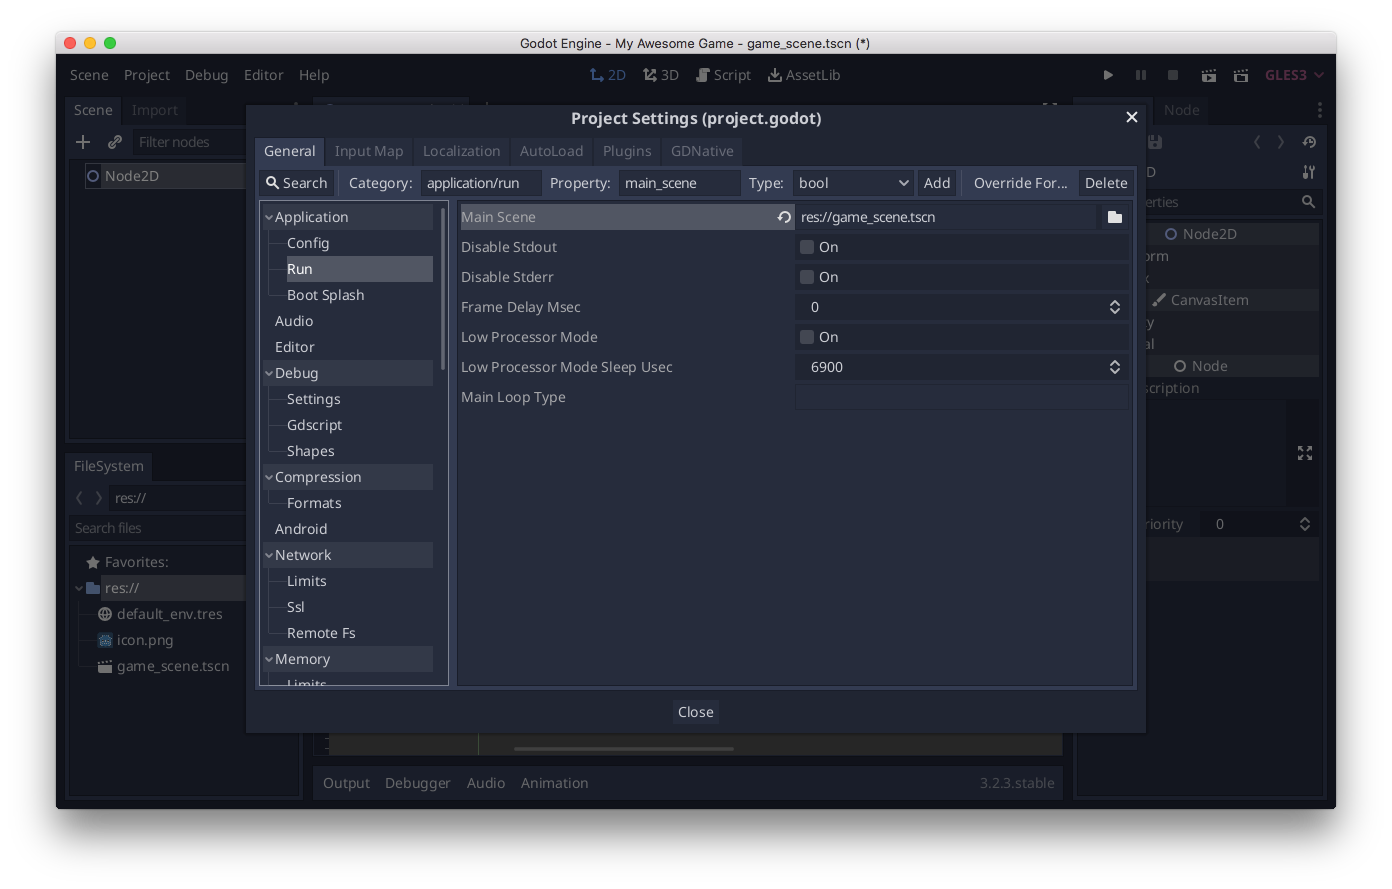
Step 6: Finally, set your new scene as the default scene for the project. Click on the Project button located on the menu bar at the top of the editor and then Project Settings. Select Run under the Application section and then select your scene created in step 5 as the main scene.
You should now be able to run the project by clicking the run triangle in the top right of the editor and see your main scene displayed!